Hero Wars Combat Questions
Note: This article features answers to frequently asked questions about the combat system — including how hero skills work, how energy generation affects battles, how team composition plays a role, and much more!
Question Regarding a Specific Battle
If you're unsure about what happened in a specific battle,
follow these steps to better understand the outcome:
1. Review Hero Skills
Read the skill descriptions of each unit in the battle. With over 200 abilities in the game, their interactions often explain unexpected outcomes. For example, if a hero targets differently than expected, check for skills that influence target selection, like Jorgen’s Leper
2. Enable Complete Skill Info
To view stat scaling and percentage values for skills:
Open Settings ![setting.png]
Go to the Gameplay tab
Switch the toggle next to Complete Skill Info
Casts a shield that blocks physical damage on the entire team. The shield’s capacity is shared between all team members.
Shield capacity: 75869 (100% Mag. atk. + 14000) damage
3. Check Damage Types
Determine what type of damage each hero deals.
Some heroes have resistance to certain damage types, affecting how much they receive.
Note:
Most heroes' basic attacks deal physical damage, except:
Satori (magic)
Celeste (magic while in Dark Form)
Augustus (magic when using Path of Least Resistance)
4. Look for Control Effects
Control effects (like stun or silence) may disrupt your heroes and change the battle outcome significantly.
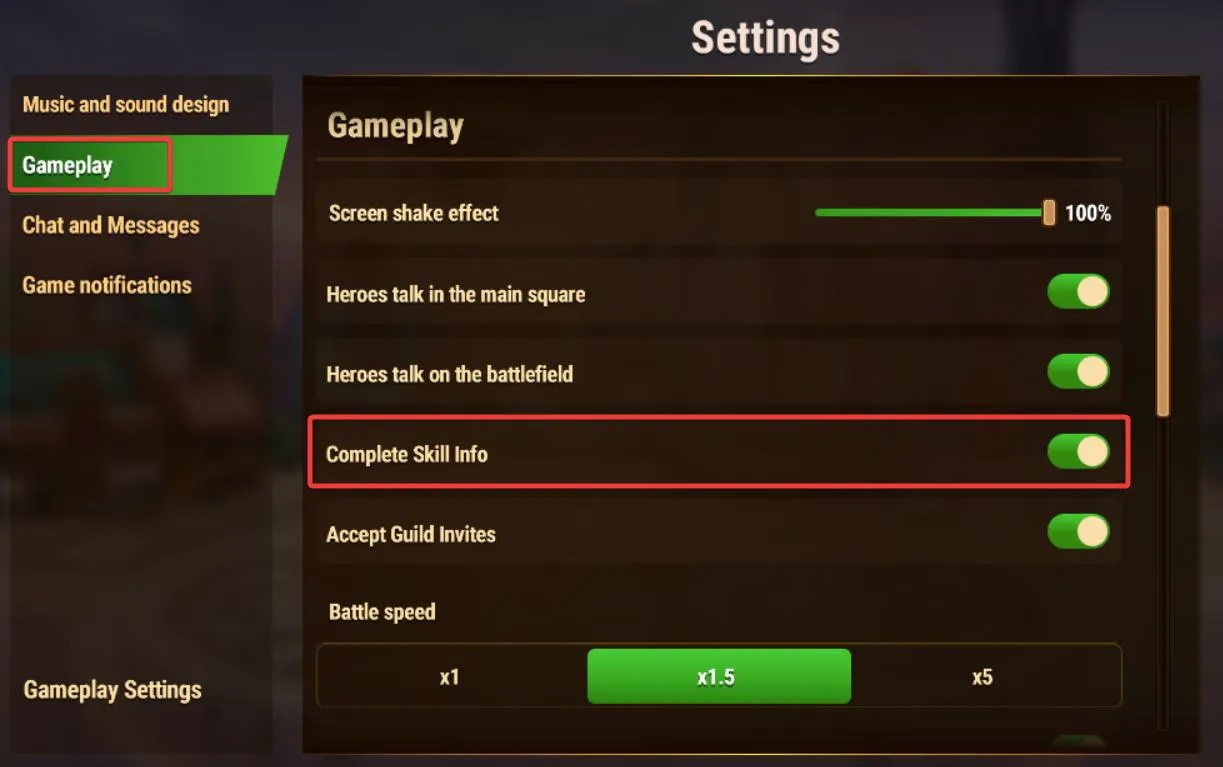
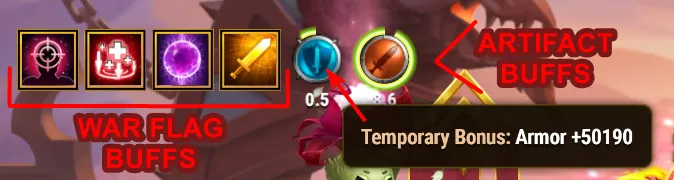
5. Examine Buffs from Artifacts & War Flags
Buffs from War Flags and first artifacts can cause unexpectedly high or low damage.
These buffs apply to the whole team.
Artifact effect icons (top-left/top-right corners) — hover over them for details.
6. Ask for Help
If you're still unsure:
Ask your Guild members
Join and ask in the official Hero Wars communities
7. Use Combat Training
Try Combat Training to:
- Recreate and analyze battles
- Test team combinations
- Experiment with different skills
- Learn character strengths and weaknesses
Even outnumbered teams can win with the right strategy.
How to Read HP Bars
In combat, each character has a health (HP) bar displayed above their head. These bars visually represent how much health a character currently has.
Green bars = your team’s health
Red bars = opponent’s health
Types of HP Bars
The appearance and structure of an HP bar change depending on a character’s total health pool.
There are four different bar types based on total HP:
0 to 30,000 HP
This HP bar looks like a ruler with lines that only go halfway down.
- Each section = 2,000 HP
- No dividers = HP is less than 2,000
Example:
This character has 3 full sections + about ⅘ of a section, which equals approximately 7,600 HP.
As total HP increases, these ruler sections become narrower, and additional longer lines subdivide them.
Example:
This bar has 8 full sections, meaning the character has around 16,000 HP.
30,001 to 200,000 HP
This bar features full-length vertical lines, each representing:
- 10,000 HP per section
Example:
This health bar shows 13.5 sections, which equals approximately 135,000 HP.
200,001 to 2,000,000 HP
The bar now appears like a checkerboard, with:
100,000 HP per section
Example:
This character’s bar displays 4.9 sections, equal to about 490,000 HP.
2,000,001 HP and higher
These bars have thick vertical lines, and only Titans reach this level of health.
Each section = 1,000,000 HP
Example:
This titan has about 6.9 sections, which means approximately 6,900,000 HP.
How to Build an Effective Team
Note: These strategies can greatly improve your chances in battle but do not guarantee victory. Factors like hero level, stats, team synergy, control effects, and game mode also impact the outcome.
No One-Team-Wins-All
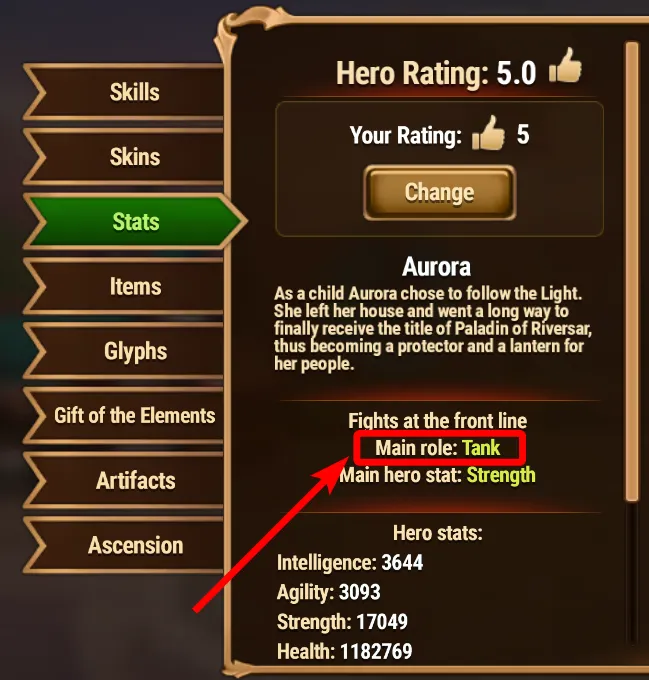
There’s no unbeatable team in Hero Wars. Opponents use a variety of heroes with different skills and synergies. The key to success is adaptation. Always evaluate:
The heroes on the opposing team
Their skills and strengths
Their vulnerabilities
Understand Hero Roles
An effective team typically includes:
1 Tank – Absorbs damage and shields the team
1 Support or Healer – Restores HP or provides buffs
2–3 Damage Dealers (Warriors, Mages, or Marksmen) – Deal primary damage
A full team of healers or damage dealers without a tank or support won’t last long in challenging battles.
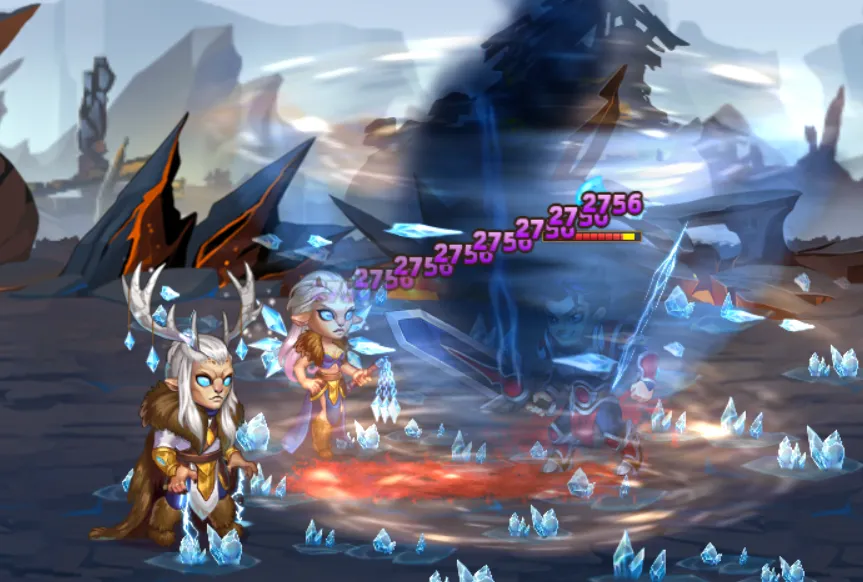
Build Synergy Between Heroes
Some heroes are designed to complement each other for maximum impact.
Example: Lars & Krista Combo
Krista places ice thorns on the battlefield using her Frozen Needles.
Lars then pulls enemies across the ice with Lord of the Storm, causing devastating AoE damage.
Special Traits for Bonus Effects
Some heroes have special traits (like Undead or Way of Honor) that unlock team-wide bonuses.
Example:
Corvus and Morrigan both share the Undead trait.
Their skills activate synergistic effects when used together.
Look for synergy not just in skills, but in traits as well.
Pick Suitable Pets
Pets can greatly amplify your team’s power when chosen wisely.
In-battle pet: Supports your team based on its abilities
Patron pet: Linked to a specific hero to boost their performance
Examples:
Merlin boosts mage damage – ideal for magic-heavy teams
Cain grants energy after dodging – perfect for heroes like Aurora, Dante, and Jet
Analyze the Enemy Team
Study your opponents before you battle. Key questions:
What type of damage do they deal?
What are they resistant to?
Example: If an enemy resists magic damage, don’t use a mage-heavy lineup. Instead, bring heroes who deal physical or pure damage.
Watch for Control Effects
If the enemy team uses control abilities (like displacement, stuns, or silences), consider counters.
Tip: Bring heroes who protect against movement effects if you notice heavy displacement.
Avoid Skill Immunity Traps
Some enemies are immune to specific status effects.
Example:
Faceless can lift enemies into the air — but not all bosses are affected by this (e.g., Brog the Conqueror in Outland).
If an enemy is immune to a core mechanic of your hero, swap them out.
Use the Right War Flag
War Flags offer combat bonuses and should align with your strategy.
Example:
- Flag of Decline reduces the opponent’s healing.
- Ideal against teams that rely heavily on sustain.
Choose the flag that targets your opponent’s biggest strength.