Daredevil Talisman Guide | Hero Wars Alliance

This Daredevil talisman guide is one that is long overdue. Despite being one of the oldest heroes in the Engineer faction, Daredevil is still widely misunderstood. Most players either ignore her completely or build her without really thinking about why. And that is a mistake, because under the right conditions, this hero can absolutely erase teams from the backline before they even have a chance to stabilize.
She is built for chaos. Built for pressure. Built to turn bullets into executions. And that is exactly why talisman choice matters so much for her specifically — because unlike some heroes where one option is obviously better from the start, Daredevil actually creates a genuinely situational conversation depending on the type of frontline you are facing.
Before we get into it, one important note on how we always present talisman stats in this series. The fixed stat comes first, and the rerollable stat comes second. That second stat is where your real optimization and adaptation begins — and for a hero like Daredevil, that flexibility is everything.
Daredevil Talisman Guide: The Two Options
Daredevil has access to two talismans, and at first glance they might seem like they serve completely different purposes. But when you actually look at what each one brings to her kit, you start to see they are both pushing toward the same goal — just through different paths.
Talisman of Recklessness
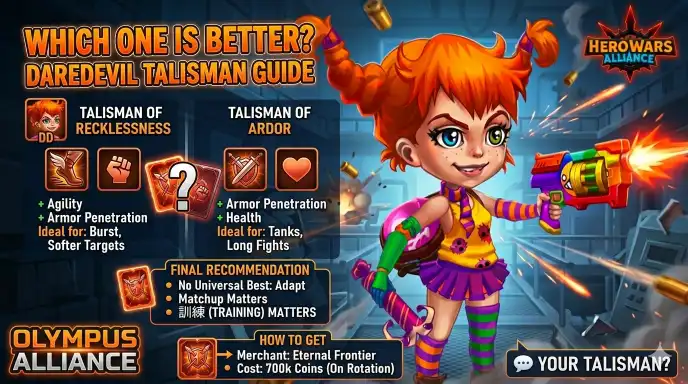
The Talisman of Recklessness arrived during the first Talisman Fever events and comes with Agility as the fixed main stat and Armor Penetration as the rerollable secondary stat.
This combination feels immediately natural for Daredevil. Agility brings Physical Attack, additional survivability, and stat scaling — all of which feed directly into what she wants to do. Add Armor Penetration on top of that, and her bullets start cutting through defensive targets with serious force.
For a hero whose entire purpose is dealing damage from the backline, this is a very attractive package. And there is also a major accessibility advantage here — the Talisman of Recklessness is available inside the Eternal Frontier Merchant for 700,000 coins whenever it rotates back into the shop. That is exceptional value, especially for free-to-play and mid-spending accounts.
Talisman of Ardor
The Talisman of Ardor flips the formula. It brings Armor Penetration as the fixed main stat and Health as the rerollable secondary stat. So both talismans are pushing offensive value — just in different directions.
Recklessness leans into raw offensive scaling. Ardor trades some of that raw damage for stronger penetration upfront and a small survivability boost through the Health secondary. It is also significantly harder and more expensive to obtain, which is an important factor worth keeping in mind for most accounts.

Skill Scaling: Why Physical Attack Wins
To understand which talisman actually performs better, you need to look at how Daredevil’s skills actually scale. And when you do that, one thing becomes obvious very quickly: Physical Attack is massively important for her overall damage output. Multiple skills scale directly from Physical Attack, meaning every point she gains multiplies her punishment across the battlefield.
This gives the Talisman of Recklessness a clear first-round advantage. We are talking roughly 16,000 Physical Attack value from Recklessness versus around 8,000 from Ardor. That is not a small difference — that is a gap that changes how hard she hits, how fast she kills, and how much battlefield pressure she creates from round one.
When Each Talisman Actually Shines
Daredevil exists for one reason: damage. Pure aggression. She is not controlling the battlefield, she is not supporting teammates — she is there to make the enemy pay before they ever reach your backline. And because of that, both Physical Attack and Armor Penetration become valuable depending on the type of fight you are entering.
Against Softer or Lightly Armored Teams
When there is no massive tank anchoring the enemy frontline, extra Armor Penetration is not what Daredevil needs. She is already capable of shredding soft targets quickly — and in those situations, the additional Physical Attack scaling from Recklessness lets her maximize body count at a terrifying pace. Her bullets hit harder, her skills scale better, and her overall pressure becomes explosive almost immediately.
Against Heavy Armor and Tanky Frontlines
Change the battlefield completely — massive frontline tanks, heavy armor, defensive walls protecting fragile backline carries — and the conversation shifts. Raw Physical Attack alone may not break through efficiently. This is exactly where the Talisman of Ardor starts becoming interesting. The fixed Armor Penetration allows Daredevil to punch through heavily protected frontlines far more consistently, keeping her damage relevant deeper into the fight. You lose some raw scaling, but you gain stronger penetration and a small Health boost that helps her survive longer exchanges.
No spreadsheet replaces actual battlefield experience here. You need to test Daredevil against different defensive structures and feel when raw offensive scaling is enough — and when penetration becomes necessary. That is the difference between copying builds and truly understanding a hero.
Which Talisman Should You Choose?
For most accounts, the Talisman of Recklessness is the stronger universal option. The Physical Attack gap is massive, the offensive flexibility it gives Daredevil is hard to argue against, and the accessibility through the Eternal Frontier Merchant makes it a very efficient investment for all spending levels.
The Talisman of Ardor absolutely has its place — specifically against heavily armored frontline structures where the fixed Armor Penetration meaningfully improves her ability to break through. If your main matchups involve big defensive tanks, Ardor can perform better in those specific situations. But as a starting point for most players? Recklessness is the call.
Daredevil may not dominate the current meta the way some heroes do, but under the right conditions she can erase teams before they react. And when you understand her dynamics correctly, she becomes surprisingly fun to play.
More Hero Wars Alliance Guides
- Kendle Season Breakdown
- Thea Talisman Guide
- Oya Talisman Guide
- Markus Talisman Guide
- Hero Wars Alliance Tier List Maker
Have you tested both talismans on Daredevil? Which one performed better for your matchups? Let us know — and tell us which Progress hero you want covered next in the talisman series.
Join the conversation and share your results on our Olympus Alliance Discord. Stay sharp, Guardians.