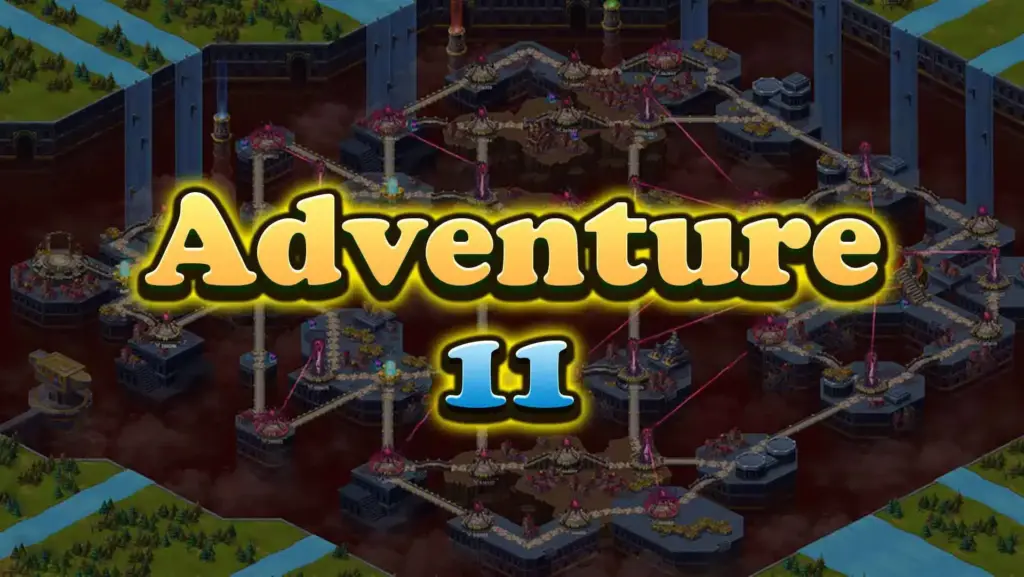
Hero Wars Adventure 11 Guide: Ghirwil City Depths
Introduction – Your First Smooth Break After Adventure 10
As soon as you step into Hero Wars Adventure 11, you immediately feel a shift, because this chapter finally brings a sense of relief after pushing through the Valley of the Elements. Although the adventure requires a level 120 team, it flows more comfortably, and that alone makes it stand out. Since so many players describe this chapter as noticeably easier, the smoother pacing becomes a refreshing change. Because of that, Adventure 11 often becomes a place where players settle in for a while before moving forward.
Moreover, this adventure introduces a layout that lets you keep moving without constant stops, and that already changes the experience in a meaningful way. Consequently, the map becomes easier to handle once you understand how each path and tower plays its part.
Overview of Ghirwil City Depths
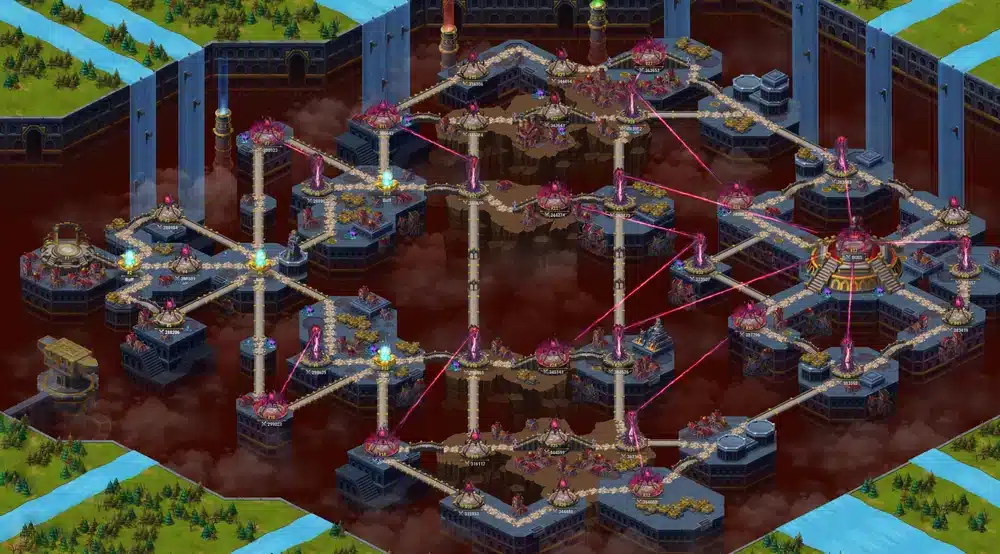
Ghirwil City Depths is the full setting of Hero Wars Adventure 11, and even though it may look complicated at first glance, it becomes straightforward as you walk through it. The adventure includes sections with different resistances: the top has plus 80% physical damage resist, the center contains both plus 80% physical damage resist and plus 80% magic damage, and the lower part offers plus 80% magic damage resist. Additionally, the boss nodes, numbered 34 and 35, have 200% health and 80% pure damage resist, which you can confirm by checking the individual node buffs.
Furthermore, the adventure offers three helpful buffs—energy gain for tanks, armor penetration for warriors, and a 100% boost to pet skills. Because these benefits shape the pace of your run, paying attention to them makes the experience smoother. At the same time, Hero Wars Adventure 11 marks a major jump in rewards, as you move from early values like 97 to 149 pet potions into a much higher range of 1988 to 3062. This also includes more chaos particles, more pet summoning eggs, and the appearance of flawless Moonstone, Nightstone, and Sunstone.
Understanding the Three Paths
⚔ ADVENTURE 11 ⚔
There are three main routes in Hero Wars Adventure 11—the upper, middle, and lower paths. However, the middle path must always begin first because it contains the towers that block the other two players. If you join the adventure first, prepare to take that route.

- BLUE: 02-04-06-08-12-17-16-22-28-29-30-31-25-19-18
- RED: 02-05-06-09-13-14-20-26-32-38-41-40-39-Boss(x2)
- GREEN: 02-03-06-07-12-11-15-21-27-36-34-33-35-Boss(x2)

- Green: 02-04-06-08-12-17-16-22-28-29-30-31-25-19-18
- blue: 02-03-06-07-12-11-15-21-27-36-39-40-41-Boss(x2)
- orange: 02-05-06-09-13-14-20-26-32-38-35-33-34-Boss(x2)

- black: 02-04-06-09-13-18-19-25-31-30-29-28-22-16-17
- white: 02-05-06-10-13-14-20-26-32-38-41-40-39-Boss(x2)
- purple: 02-03-06-08-12-11-15-21-27-36-34-33-35-Boss(x2)
- black: 02-04-06-09-13-18-24-30-29-28-22-16-17-23
- white: 02-05-06-10-13-14-19-25-31-32-38-35-33-34-Boss
- purple: 02-03-06-08-12-11-15-21-27-36-39-40-41-Boss(x2)

- blue: 02-04-06-09-13-18-24-30-29-23-17-16-22-28
- green: 02-05-06-10-13-14-19-25-31-32-38-35-33-34-Boss
- red: 02-03-06-08-12-11-15-21-27[-28]-36-39-40-41-Boss(x2)

- blue: 2-4-6-8-12-17-18-19-25-31-30-29-28-22-16
- red: 2-3-6-7-12-11-15-21-27-36-39-40-41-Boss(x2)
- purple: 2-5-6-9-13-14-20-26-32-38-35-Boss(x2)-34-33
This map allows blue, red, and purple to have multiple defeats and still be almost guaranteed three chests. It removes the risk of not being able to defeat the boss should blue, red, or purple be defeated by surprise. For stronger teams going for 4 chests, it allows for any of the three teams to be defeated once, while still providing 3 x attacks on the boss.
- blue: 02-04-06-08-12-17-18-19-25-31-30-29-28-22-16
- red: 02-03-06-07-12-11-15-21-27-36-39-40-41-Boss(x2)
- purple: 02-05-06-09-13-14-20-26-32-38-35-33-34-Boss(x2)
Why the Middle Path Goes First
The most advanced team should take the middle route, as you encounter nodes with different resistances along the way. For instance, as you continue north, you eventually reach a node such as number 22 that contains physical damage resist, reminding you that this route demands both physical and magic damage to stay effective. Since the narrator’s team in the script focuses mostly on physical attacks, they continue choosing physical attack bonuses along the route.
Because this adventure contains several buffs you can collect—specifically four—this becomes extremely useful if you have season tasks that require gathering buffs.
The Critical Buff Warning: Hero Wars Adventure 11
Although you can pick up several buffs while taking the middle path, one detail is extremely important. The script explains that the first player advancing through the center should not take the magic damage resist buff found at node number 6. Because the final boss, Corrupted Orion, deals strong magic damage, another player fighting the boss must take that buff later. Consequently, taking it too early removes that protection from the rest of the team.
How the Middle Loop Clears the Map
The middle path in Hero Wars Adventure 11 is constructed to loop around. Because of that, your job becomes clearing towers that would otherwise block the upper and lower routes. As an example, when you remove the tower at number 31, it affects number 32, and it also influences number 35 once you scroll up. Moving forward, taking out number 30 is important because it provides a buff to the boss. Similarly, number 29 must be removed as well.
The adventure requires you to follow a specific loop, so avoid going to number 24, which you should not clear. The same applies to number 23. Therefore, you simply continue upward toward the towers that allow others to advance without stopping.
Later, you reach a node with 80% physical damage resist. Since the narrator’s team is mostly physical, this raises doubt, yet pure damage from Sebastian ultimately carries the fight. After clearing that challenge, you finish the loop by removing node 16, which completes your responsibility in opening the map.
Once this is done, the top and bottom players can progress all the way to the boss without facing any interruptions. Even though they might wait for one more set of towers, the overall flow remains far smoother than what players experienced in Adventure 10, which required more coordination and frequent pauses.
Facing the Final Boss: Corrupted Orion– Hero Wars Adventure 11
At the end of Hero Wars Adventure 11, you encounter Corrupted Orion, a boss built entirely around magic damage. Consequently, you must prepare a team that can handle heavy magic attacks. According to the script, bringing Isaac can be extremely helpful because he performs well against magic attackers. Alternatively, a hero like Athea can activate a magic defense artifact, reducing the amount of incoming magic damage.
When you add in the earlier buff considerations and the cleared tower paths, the encounter becomes simple to manage. Because of that, this adventure remains one of the more comfortable stages before you move into later challenges.
Conclusion: Staying in Adventure 11 and What Comes Next
Many players remain in Hero Wars Adventure 11 for a while because the progression becomes easier and the rewards continue climbing. Furthermore, this same layout appears again in adventure 13, which means everything you learn here becomes useful later. After completing this chapter, you eventually move on to adventure 12, which the narrator mentions will be discussed next. For more guides, visit Hero Wars Dominion Era blog on our website.
Check out:
Adventure 13
Adventure 12
Adventure 10
Adventure 9
Adventure 8
Adventure 7
Adventure 6
Adventure 5
Adventure 4
FAQs: Top Hero Wars Adventure 11 Questions
It feels easier because you can move through the center loop without constant waiting, which removes the coordination issues that made Adventure 10 more difficult.
They must go first because they clear the towers that block the upper and lower players from advancing.
It is needed for the teammate who fights Corrupted Orion, since he deals high magic damage.
The major jump in pet potions—from early ranges like 97–149 up to 1988–3062—stands out as a dramatic increase.
He deals strong magic damage, so you must use heroes who reduce or counter magic attacks.