Hero Wars Lumira Map Guide

The Hero Wars Lumira Map Guide is here — and this one plays differently from what you are used to. One map, five towers, and a season chest reward for every single explorer move you spend. There is no second island to split your attention, which means every decision you make on this map is a direct trade-off between move cost and reward value. Let’s break it all down so you do not waste a single step.
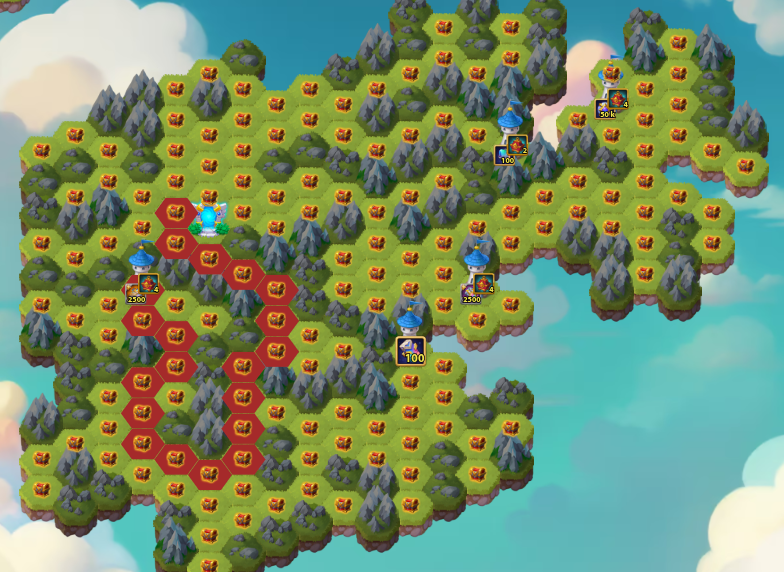
Lumira Map: 5 Towers Overview
Every tower on this map has something worth talking about. Here is a full breakdown of what each one offers and who should prioritize it.
1. Cosmos Seal Tower (Black Path)
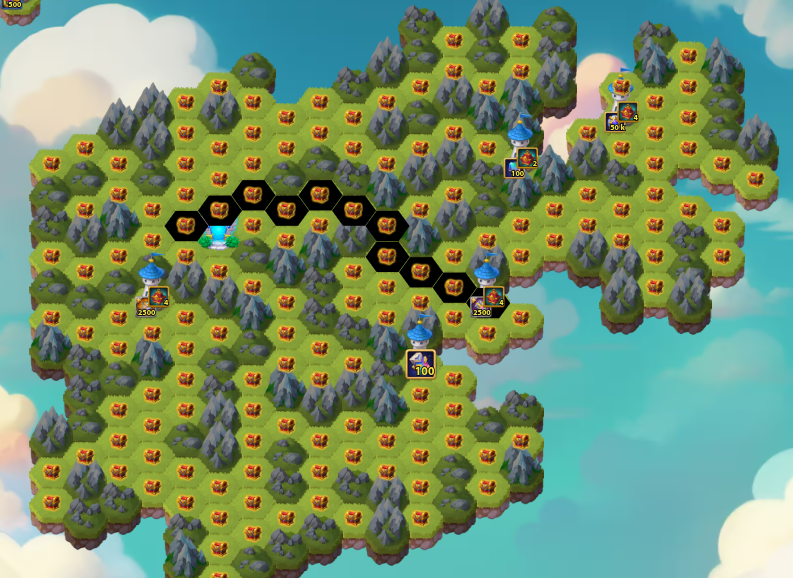
Main Rewards:
- 2,500 Cosmos Seal
- 4 Pattern Chests
This is the closest tower on the entire map and the natural first stop for most players. At just 11 explorer moves, the Cosmos Seal Tower is an easy priority — it costs the least and returns a solid combination of Cosmos Seals and four Pattern Chests. If you are planning a route that covers multiple towers, this is almost always your starting point since the Yellow and Orange paths branch off from here.
2. Primal Catalyst Tower (Blue Path)
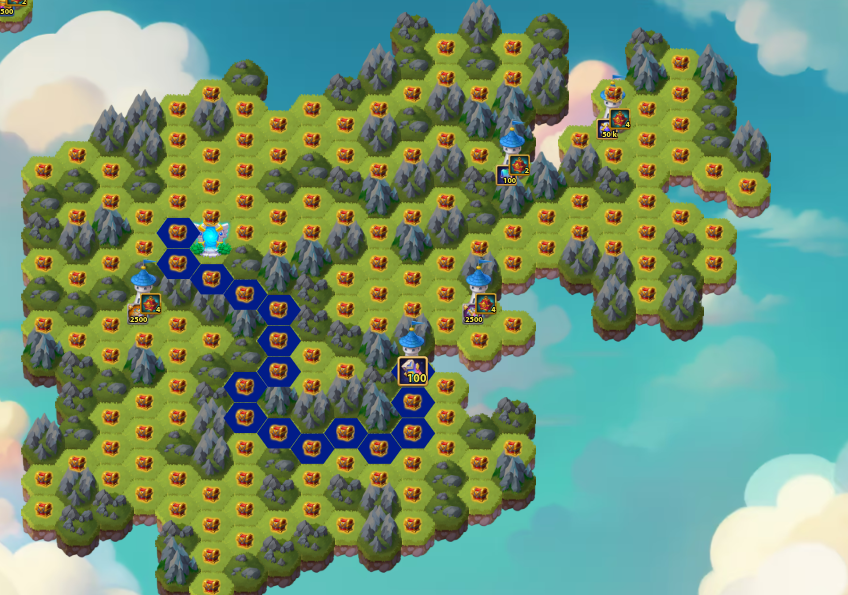
Main Rewards:
- 100 Primal Catalyst
- 2 Pattern Chests
The Blue path leads you to the Primal Catalyst Tower at 12 explorer moves. This is also the second cheapest tower on the map, making it accessible for players who cannot clear everything. Primal Catalysts are consistently valuable for hero progression, and the Blue path doubles as the route toward the Red path’s Tome of Belav Tower later — so taking this one early is smart move management if you are planning to go deeper.
3. Elemental Catalyst Tower (Yellow Path)
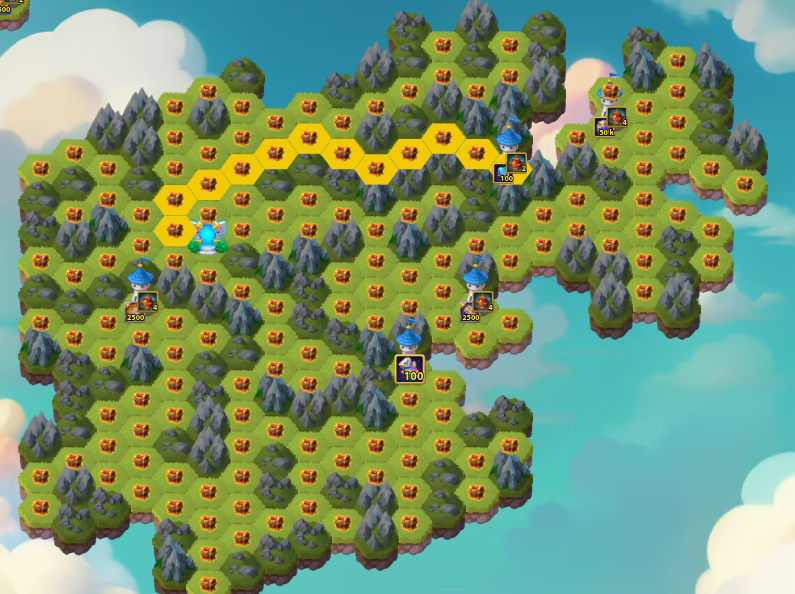
Main Rewards:
- 100 Elemental Catalyst
The Yellow path tower costs 16 moves from the start, but here is the important detail: if you have already followed the Black path to Tower 1, you only need 9 extra moves to reach this one. That makes the Elemental Catalyst Tower a very efficient pickup for any player already heading through the Black route. Elemental Catalysts are not always easy to come by, so this is a smart secondary target if your account needs them.
4. Valor Coin Tower (Orange Path)
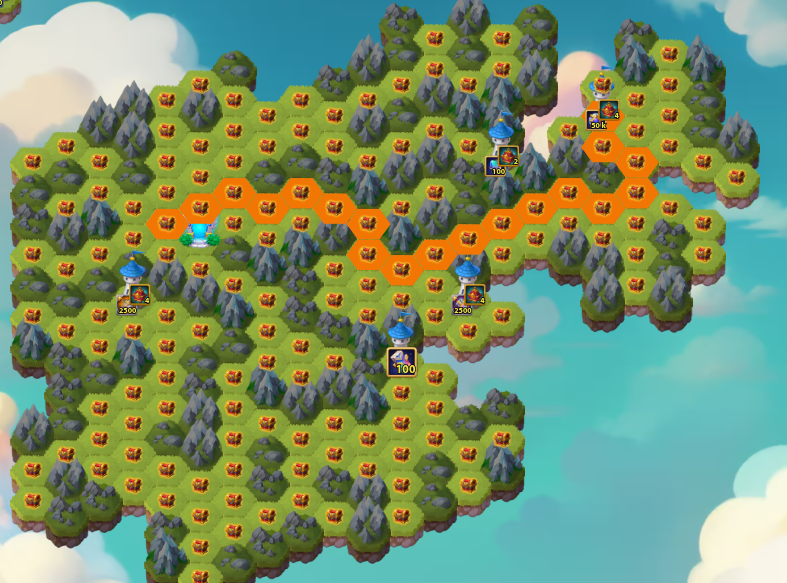
Main Rewards:
- 50,000 Valor Coins
- 4 Pattern Chests
This is one of the highest-value towers on the map. 50,000 Valor Coins is a significant haul, and the four Pattern Chests on top make this a very attractive target. It costs 19 moves from the start, but if you have already taken the Black path, you only need 10 extra moves to reach it. The reward-to-extra-moves ratio here is excellent, especially for players building out their Valor progression. Prioritize this one if you are already running through the Black route corridor.
5. Tome of Belav Tower (Red Path)
Main Rewards:
- 2,500 Tome of Belav
- 4 Pattern Chests
The most expensive tower on the map at 20 moves, but it matches that cost with one of the most desirable rewards. 2,500 Tome of Belav is a major resource for players investing in Lumira’s artifact progression, and the four Pattern Chests add strong additional value. If you have already taken the Blue path to Tower 2, you only need 11 extra moves to reach this one — making the Blue and Red routes a powerful combo for artifact-focused players.
Hero Wars Lumira Map Guide: Route Optimization
Smart routing on this map is the difference between getting everything and running out of moves halfway through. The full clear costs 56 explorer moves total. Because the Black and Blue paths share corridors with the other routes, how you sequence your movement matters a lot. Plan before you spend a single move.
Lumira Map: Full Strategy Visualization
Planning your route on the Hero Wars Lumira Map is the most critical step to ensuring you don’t run out of explorer moves before reaching your target towers. We’ve prepared this high-definition, color-coded map to help you visualize the exact paths for each route.
By following the color-coded paths, you can see exactly where routes overlap and where they branch. Pro Tip: Click the image to open the full high-resolution version in a new tab for maximum detail.
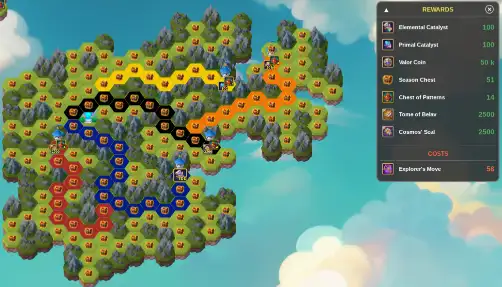
Click the map to enlarge • Optimized for Hero Wars Lumira Map Guide
What Do You Get Per Move? Season Chests Explained
One of the most important things to understand about the Hero Wars Lumira Map Guide is that the towers are not your only source of rewards. Every explorer move you spend — except moves spent entering towers — rewards you with a Season Chest. This means every step across the map is contributing to your overall resource gain, not just the tower finishes.
Inside the Season Chests:
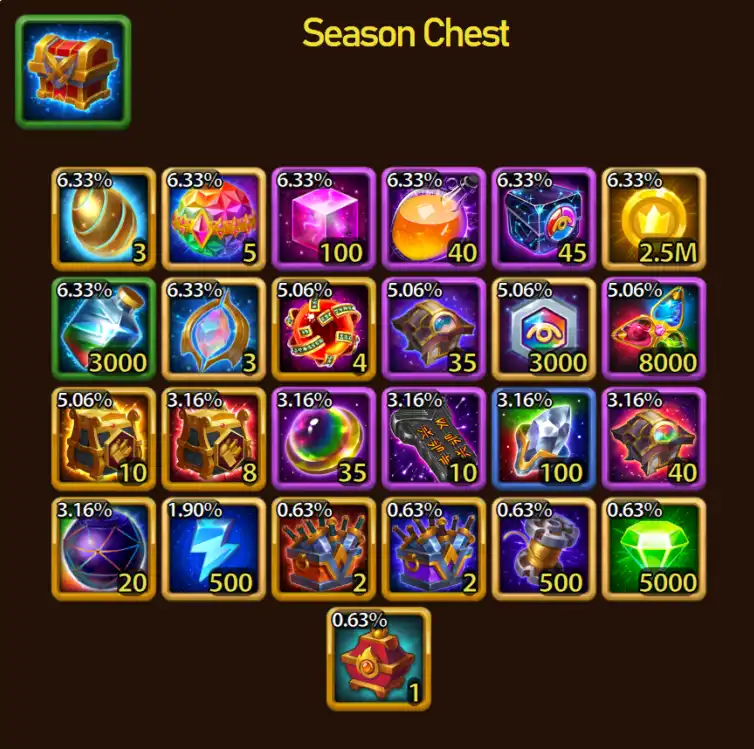
Drop rates vary between guaranteed rewards and lower-percentage items — making every chest opening genuinely valuable to your account progress.
Even a partial map clear is worth your time because of these step-by-step chest rewards. Whether you are going for all 56 moves or just targeting one or two towers, you are earning resources on every single move. Maximize your daily explorer move count throughout the event to get the most out of every session.
Pro Tip: Stack your Season Chests and open them together to get a clearer picture of your total resource gains across the full event.
Recommended Hero Wars Guides
Join the Community
Which tower are you targeting first on the Lumira Map? Drop your route in the comments! For real-time event updates and strategy discussions, join our Discord:
JOIN THE DISCORDStay sharp, plan your route, and clear the Lumira Map efficiently.